Redesigning the cartridge shell around the label
Rusty Nail's cartridges are Game Boy shells around a 16 MiB SPI flash chip - the tour post covers the electronics. Today the outside caught up with the inside: the shell got redesigned around the thing that actually matters when a cartridge is sitting in your hand, which is the label.
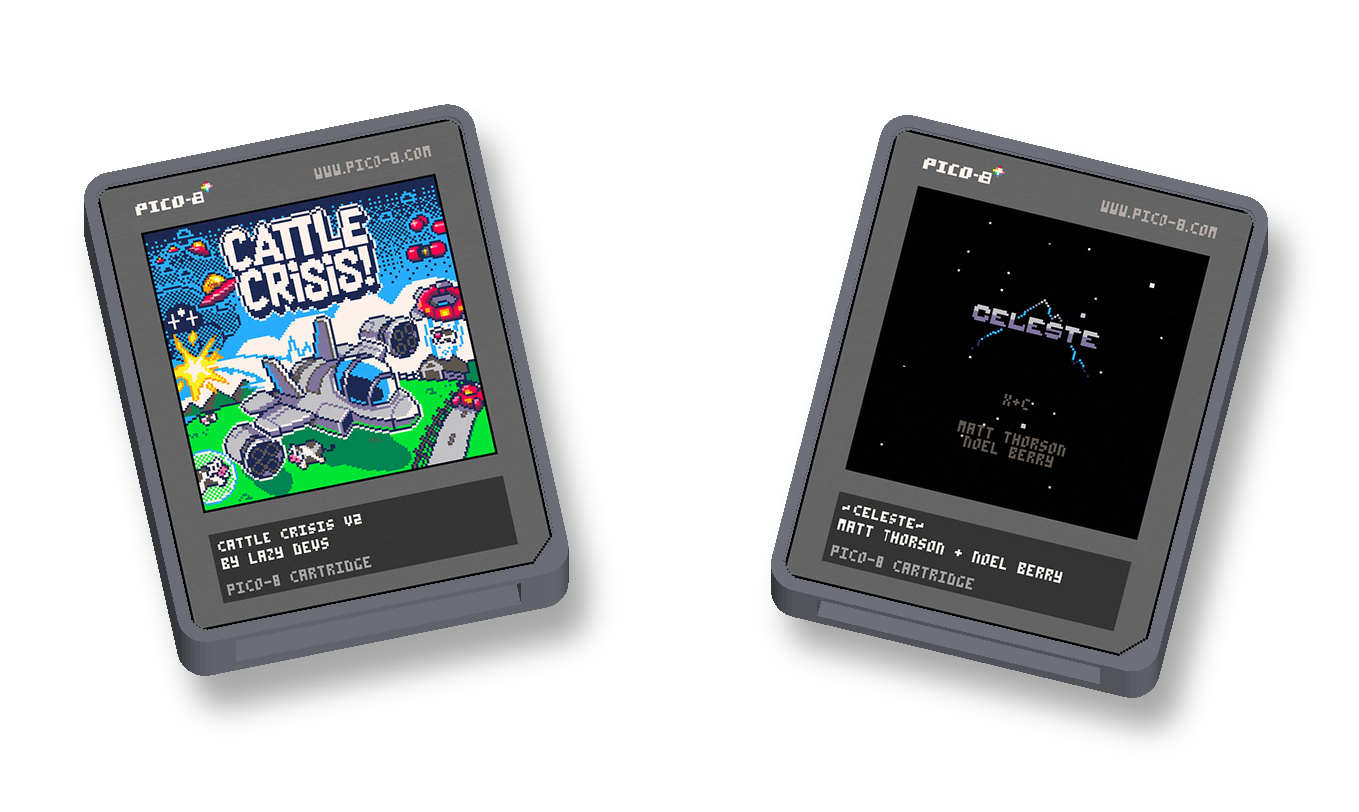
Those are renders of the actual print files - the STL geometry rasterised with the cart artwork composited into the sticker pocket at true scale. Nothing in this post has been physically printed yet; that is the point of it. By the time the printer runs, every dimension here has already been measured against every other.
Designing from the label backwards
A PICO-8 cartridge PNG is 160x205 pixels and it is not just a picture of a label - it is a picture of a whole cartridge: the header strip, the art window, the title block, and one detail I had never consciously registered until I zoomed in: the bottom-right corner is not rounded like the other three. It is a 45-degree chamfer, and it is exactly 10 pixels:
185 #####++++++++++++++#
    ...
195 ++++++++++++++++++#+
196 +++++++++++++++++#++
197 ++++++++++++++++#+++
        (the diagonal, one pixel per row)
202 +++++++++++#++++++++
203 ++++++++++#+++++++++
204 ##########++++++++++
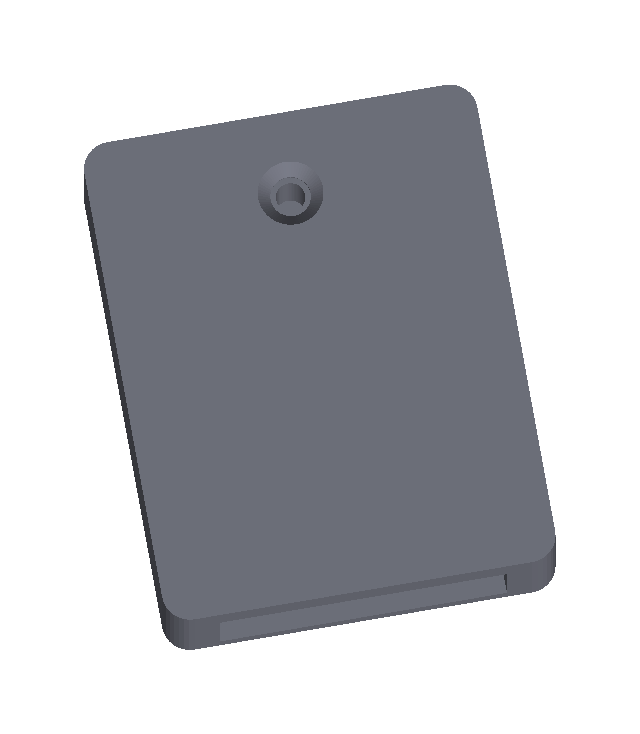
So the shell now follows the artwork instead of approximating it. The face is a 160:205 rounded rectangle; the front carries a 0.3 mm deep pocket - sticker paper is about 0.25, so a label sits flush - with the rounded corners and that 10/160 chamfer built into the pocket outline itself. The pins moved inside (the board rides 6.1 mm high, tips stopping 1.5 mm inside the bottom mouth, where the future dock will reach them), the four front screws became one DMG-style screw in the back, and the back face went completely flat after the rev 1 print demonstrated what a staircase bevel looks like at 0.2 mm layers, which is: bad.
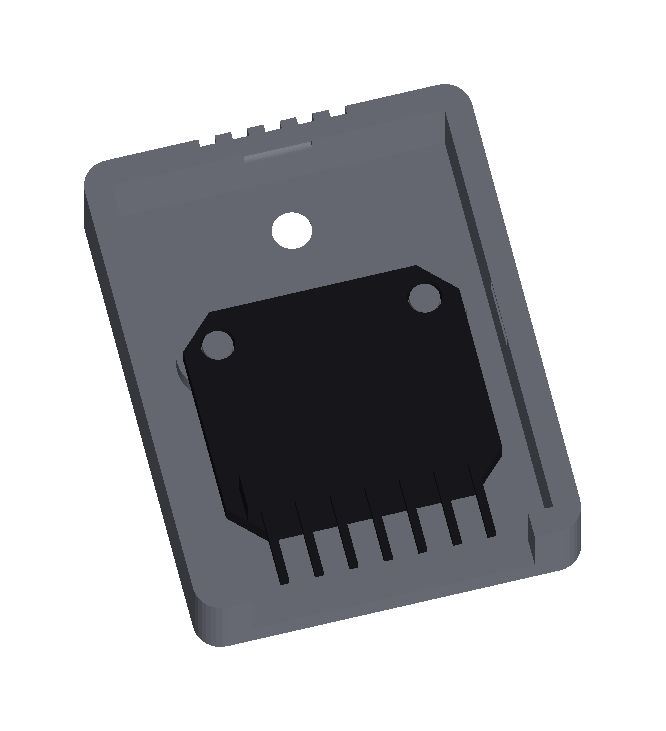
And this is the inside of that promise - the open shell with the actual W25Q128 flash breakout seated on its locating pegs, the seven right-angle header pins descending toward the mouth and stopping short of daylight. Nothing pokes out of this cartridge; the dock reaches IN instead:
The zero-clearance mistake
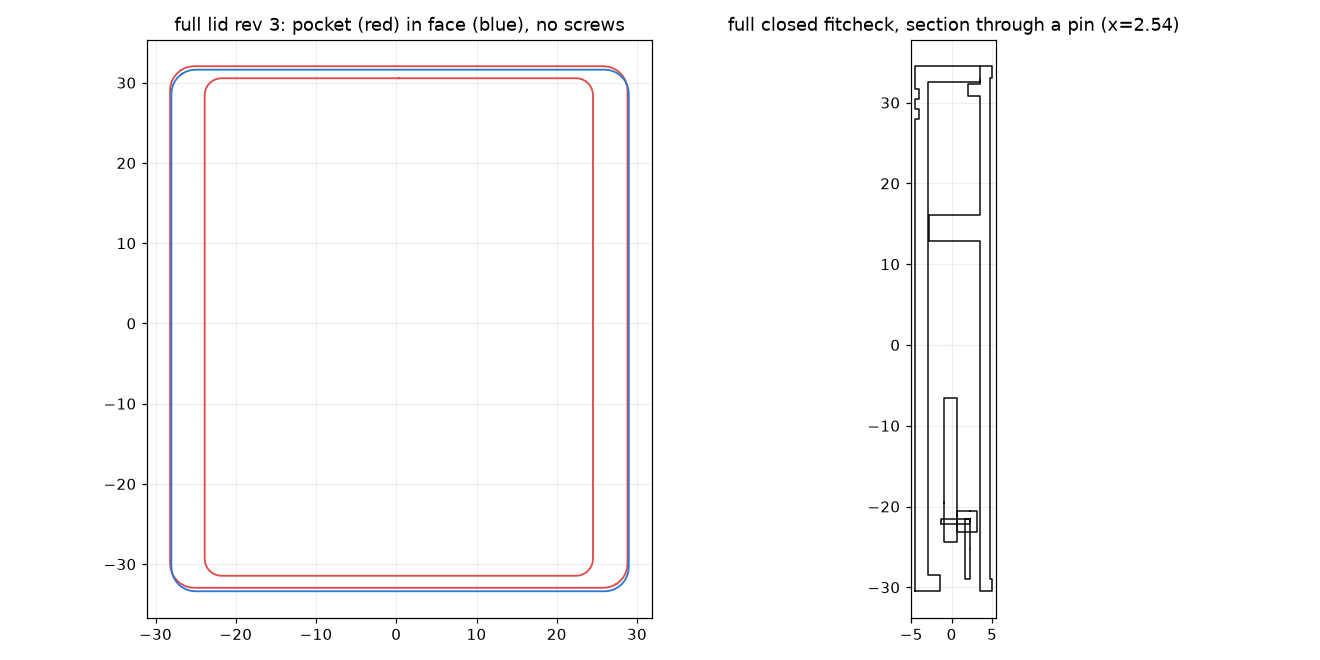
The first version of the pocket was cut at exactly the sticker's size, which sounds correct and is actually a jam: a hand-cut paper rectangle does not drop into a cavity of identical dimensions. The pocket now carries 0.15 mm of placement clearance per side, and rather than trusting the constants, a test script measures the finished artifacts against each other: it sections the exported STL through the pocket depth and measures the actual cavity in the mesh, builds a sticker sheet through the actual generator, verifies the page geometry, and fails like a broken build if the fit leaves the 0.2-0.5 mm band:
[mini] pocket (measured from STL) 26.80 x 34.25 |
       sticker (verified from PDF) 26.50 x 33.95 |
       clearance 0.30 x 0.30 -> FIT OK
[full] pocket (measured from STL) 48.69 x 62.30 |
       sticker (verified from PDF) 48.39 x 62.02 |
       clearance 0.30 x 0.28 -> FIT OK
The same section-based checking proved the hidden pins: the closed fit-check model - the assembled shell with an exact module mock inside - sections to show the header legs ending above the bottom face, inside the mouth:
Stickers, printed honestly
The sticker sheets come from a small generator that takes any cart PNG and lays it out at exactly pocket size, masked to the cut shape (rounded corners, chamfer, corners printing as blank paper), with hairline cut guides:
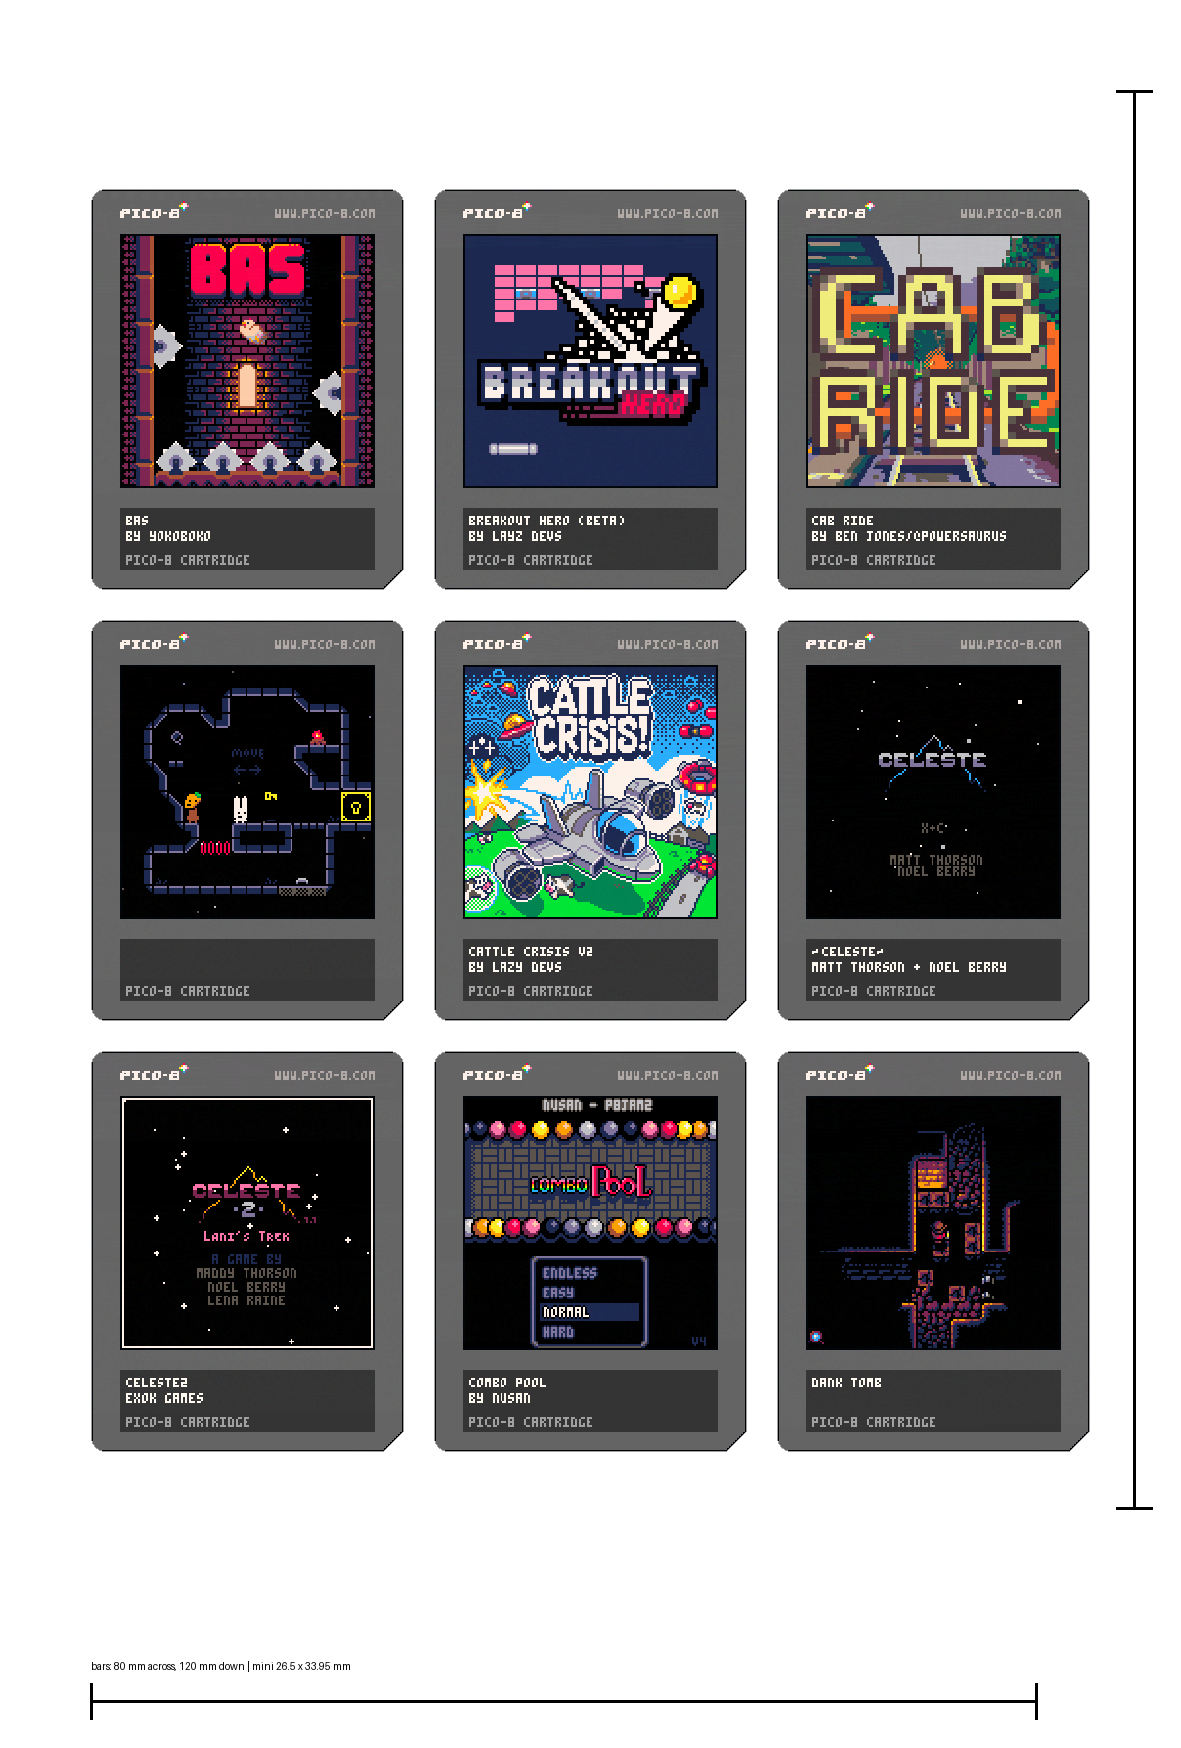
The printer is a Canon SELPHY CP1500
- a dye-sub postcard printer, which is both the best and the most treacherous tool for this. Best because dye-sub output is gorgeous and waterproof-ish; treacherous because its borderless mode silently enlarges the image a few percent before trimming, which would quietly wreck every dimension on the sheet. So the sheets are generated at the printer's native pixel grid (1181x1748 for its 100x148 paper), every sheet carries an 80 mm and a 120 mm calibration bar - two, because dye-subs can scale the axes unequally - and the generator takes the measured bar lengths back as a calibration input and pre-compensates everything. One ruler measurement, dialled in for good.
The bit I am fondest of: the generator can ask the console what to print. Favourites on the launcher are stored as name hashes; the sticker tool reads that list over the same debug channel the screenshot tool uses, matches it against the library, and prints sheets of exactly the games I have starred from the couch. Twenty-two favourites, three postcards, nine stickers each.
The loop this closes
Star a game on the console. Run one command; the printer hands back its labels. Choose FLASH in the library and the console burns the game onto a cartridge; the sticker drops flush into the pocket on the front of its shell. A physical, labelled, playable cartridge for any game in the library, made entirely at the desk, and every interface in that chain was measured against its neighbour before anything got made.
The sticker paper is on order. The shells reslice tonight. The first photograph of a real one, label seated, belongs at the top of the next post.